SuperGloo to the Rescue! Making it easier to write extensions for Service Meshes.

SuperGloo

Overview

SuperGloo is a new open source project that helps with managing service meshes at scale. SuperGloo provides an opinionated abstraction layer that simplifies the installation, management, and operations of one or more service meshes like Istio, AWS App Mesh, Linkerd and HashiCorp Consul. Supports on-site, in the cloud or any combination you need.

SuperGloo Architecture

There are a growing number of articles on why SuperGloo, like Christian Posta’s “Solo.io Streamlines Service Mesh and Serverless Adoption for Enterprises in Google Cloud”. This article is going to focus on how SuperGloo can help software packages like Weaveworks Flagger work on multiple Services Meshes like Istio and AWS App Mesh that both support traffic shifting.

Flagger is a cool open source project that automates the promotion of Canary deployments of your Kubernetes services. You associate a Flagger Canary Kubernetes custom resource (CRD) with your deployment and Flagger follows your defined rules for helping roll out a new version. It detects when a new version of your service has deployed, instantiating your new version in parallel to your existing version, slowly shifting request traffic between the two versions, and using your defined Prometheus metric health checks to determine if Flagger should continue moving more traffic to the new version or roll back to the old version. Since a Canary CRD is a YAML file, this provides you a declarative way to ensure that all of your service upgrades follow your prescribed sophisticated rollout strategy and complements GitOps pipelines used in Weave Flux and JenkinsX.

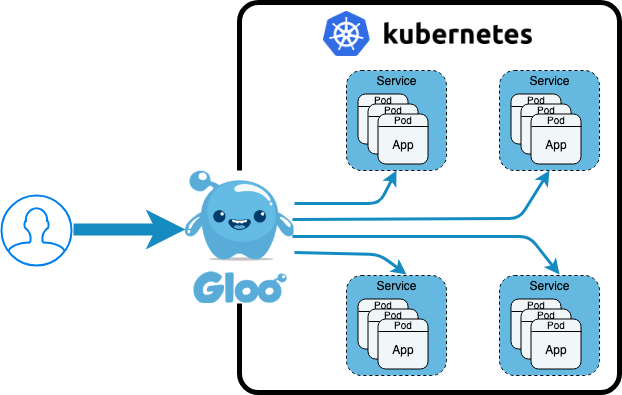
More information on what Canary deployments and Traffic Shifting are is in the following posts. Gloo uses the same underlying data plane technology - Envoy - as Istio to provide traffic shifting capabilities used by Flagger and Knative. Gloo is an API/Function gateway and not a full Service Mesh, so Gloo can be used in use cases that do not require all of the power, and weight, of full service mesh implementations.

This article quickly runs through setting up the Flagger podinfo example extension on SuperGloo with Istio so you all can see what’s involved and try yourselves if you like.

Install Kubernetes and Helm

The first step on our journey is to get a basic local Kubernetes cluster running. My friend Christian Hernandez clued me in on kind (Kubernetes IN Docker) from the Kubernetes sig-testing team. It’s a fast, lightweight way to spin up/down a local cluster assuming you have a locally running copy of Docker, e.g., Docker Desktop. This example works equally well in minikube if you prefer. The following code does the basics you need for most Kubernetes clusters.

  • Creates a kind cluster with one control plane node and one worker node
  • Configures the KUBECONFIG as kind creates a separate kubeconfig file for each kind cluster
  • Installs Helm and Tiller with a service account for Tiller

Install SuperGloo and SuperGloo installs and configures Istio

Here’s where the magic happens so let’s spend a little time teasing out all the things that are happening due to these few lines of code.

The first command supergloo init installs SuperGloo into your Kubernetes cluster that is equivalent to using Helm to install SuperGloo.

The second command kubectl --namespace supergloo-system rollout status deployment/supergloo --watch=true is a hack to wait till the SuperGloo deployment is fully deployed and running. It’s similar to using the --wait option on a Helm install.

The supergloo install istio ... command declares a custom resource and the SuperGloo controller installs and configures Istio as declared. In this case, we are installing Istio version 1.0.6 with Istio’s Prometheus installation and with Istio deploying sidecars in all pods within namespaces with the label istio-injection=enabled, i.e., Istio’s default behavior for auto-injecting sidecars. This imperative supergloo install istio command creates the following manifest that you could kubectl apply if you prefer. Refer to the full Install specification for more details.

Install Flagger

The following install Flagger and its dependent parts. The following is a quick summary of installing Flagger. More details at Flagger Doc Site.

  1. Add a reference to Flagger helm repo
  2. Wait for Tiller to be fully running. Only an issue for quick scripts that create Kubernetes clusters from scratch
  3. Create a cluster role binding that allows Flagger to modify SuperGloo/Istio resources
  4. Install core Flagger referencing Istio’s provided Prometheus and telling Flagger that SuperGloo is the mesh controller
  5. Install Flagger’s Grafana dashboards which are not used as part of this demo
  6. Install Flagger’s LoadTester which can help generate test traffic during a Canary deployment if there is not enough user traffic

Install Flagger example application

The example application podinfo is a simple golang web application. It is instrumented with Prometheus so we can tell if it’s performing well (or not) that helps with our Canary deployment to validate that the new version is handling incoming traffic. The example application also has hooks to allow you to generate faults if you want to explicitly fail a deployment to see how the Flagger Canary handles that situation. Full details on the options around the Flagger example application are here. The following is the summary of installation steps.

  1. Install a test namespace, the example Kubernetes Deployment manifest and an (optional) horizontal pod autoscaler
  2. Deploy the Canary policy for the example application. More details on that in a moment
  3. Wait for the Canary controller to report that it’s fully ready, which means Istio and Flagger are fully deployed and running

The Canary manifest has a target reference that associates it with the podinfo deployment. The Canary analysis says that for every interval (1 minute) Flagger increment by stepWeight (10%) more request traffic to the new version up to maxWeight (50%) as long as the metrics stay within the defined healthy ranges. If more than threshold (5) health checks fail, then rollback to 100% of traffic to the old version and delete the new version deployment. There is also an optional section to allow the Flagger loadtester to generate additional traffic to help validate the new Canary version, i.e., hard to know if the new version works if it has not handled any requests.

Deploy a new image version and watch the Canary deployment

First, we check on the currently deployed image version and print that out to help us verify if the test updates the service like we expect; should be quay.io/stefanprodan/podinfo:1.4.0. Then to help make the changes more visible, we trigger a background process to update the image version to quay.io/stefanprodan/podinfo:1.4.1 after a five second delay. We then loop and print out the change events for podinfo to see the traffic weight changes until the Canary reports Success. You’d need to change this loop if you want to try introducing errors to see the Canary rollback. Lastly, we’ll print out the image version which should be quay.io/stefanprodan/podinfo:1.4.1 is everything succeeded.

Cleanup Kubernetes

The final step is to clean up the Kubernetes cluster, which in our case means to delete the kind cluster by running kind delete cluster and unsetting the KUBECONFIG environment variable.

Everything

Here’s an Asciinema screen recording of the whole example script running, and afterward you can see the whole script if you wanted to try yourself. The Asciinema recorder speeds up any long running commands, that is, if a command takes more than two seconds to execute the playback delays up to two seconds. This speedup reduces the run time from 15+ minutes to around two minutes.

Summary

Hopefully, this example gave you a taste of how SuperGloo supports a Canary deployment engine like Flagger. Before SuperGloo you’d either need to learn how to install all of Istio yourself or be constrained to using a managed Istio or App Mesh installation from GKE or AWS respectively. Those are good managed offerings, but they do limit your choices to the versions and configurations they currently support.

SuperGloo provides a great abstraction and management layer to help extensions leverage one or more Service Meshes without needing to get deep into the weeds of the huge API surface area of any one of the meshes like Istio or App Mesh. SuperGloo makes it easy for applications to use just what they need of the underlying meshes. That helps with adoption on Service Meshes based on the feedback I’ve heard, that is, many are currently experimenting with Istio or App Mesh or Linkerd for just on capability, typically traffic shifting or mutual TLS, and they’re finding it difficult to manage and configure the whole mesh even though they aren’t using those other capabilities. SuperGloo to the rescue to help make it easier to use just the parts of Service Meshes that add value today, and allow you to add more as you need it including mixing and matching multiple service meshes easily to get the biggest return on your investment.

I strongly encourage you to learn more yourself as its fun to learn new technology, especially tech that helps you solve complex challenges and accelerates your ability to deploy larger and more sophisticated systems.

Kubernetes Ingress Past, Present, and Future

Photo by Luke Porter.

Overview

This post was inspired by listening to the February 19, 2019, Kubernetes Podcast, “Ingress, with Tim Hockin.” The Kubernetes Podcast is turning out to be a very well done podcast overall, and well worth the listen. In the Ingress episode, the podcasters interview Tim Hockin who’s one of the original Kubernetes co-founders, a team lead on the Kubernetes predecessor Borg/Omega, and is still very active within the Kubernetes community such as chairing the Kubernetes Network Special Interest Group that currently own the Ingress resource specification. Tim talks in the podcast about the history of the Kubernetes Ingress, current developments around Ingress, and proposed futures. This talk inspired me to reflect on both Ingress Controllers (realizes the implementation of Ingress manifest) and Ingress the concept (allow client outside the Kubernetes cluster to access services running in the Kubernetes cluster).

So what’s a Kubernetes Ingress?

To paraphrase from the Kubernetes Ingress documentation, Ingress is an L7 network service that exposes HTTP(S) routes from outside to inside a Kubernetes cluster. A Kubernetes cluster may have one or more Ingress Controllers running, and each controller manages service reachability, load balancing, TLS/SSL termination, and other services for that controller’s associated routes.

Gloo as Ingress

Each Ingress manifest includes an annotation that indicates which Ingress controller should manage that Ingress resource. For example, to have Solo.io Gloo manage a specific Ingress resource, you would specify the following. Note the included annotation kubernetes.io/ingress.class: gloo.

apiVersion: extensions/v1beta1
kind: Ingress
metadata:
  annotations:
    kubernetes.io/ingress.class: gloo
  labels:
    chart: jsonplaceholder-v0.1.0
  name: jsonplaceholder-jsonplaceholder
  namespace: default
spec:
  rules:
  - host: gloo.example.com
    http:
      paths:
      - path: /.*
        backend:
          serviceName: jsonplaceholder-jsonplaceholder
          servicePort: 8080

Ingress Challenges

Ingress has existed as a beta extension since Kubernetes 1.1, and it’s proven to be a lowest common denominator API. For example, the NGNIX community Ingress Controller is used by many in production, but that NGNIX Ingress controller requires the use of many NGNIX specific Ingress Annotations for all but the simplest use cases. The current Kubernetes Ingress resource specification has many limitations like that all referenced services and secrets MUST be in the same namespace as the Ingress, i.e., no cross namespace referencing. And there have been long debates about how exactly to interpret the path attribute; is it a regular expression like the documentation implies OR is it a path prefix like some controllers like NGNIX implement. These challenges have made it, in practice, difficult to have an Ingress manifest that is portable across implementations. The current Ingress manifest has also proven difficult to round trip sync with Custom Resources (CRD) which is unfortunate as CRDs are proving to be a beneficial way to extend Kubernetes.

What’s Next for Ingress?

In the podcast, Tim Hockin says given how many are using the current beta Ingress spec in production, there is a push to move the existing Ingress spec to GA status, and then start work on a next-generation specification, either an Ingress v2 or breaking up Ingress across multiple CRDs. Tim mentions how the Kubernetes community is looking at several Envoy based Ingress implementations for inspiration for the next generation of Ingress. For example, Heptio Contour has created a very interesting, and implementation neutral CRD called Ingress Route. An Ingress Route looks to address the governance challenges with Ingress, for example, if a company wants to expose a /eng route path there are many challenges with the current Ingress model as you can have conflicting Ingress manifests for the route /eng. Ingress Route provides a way to create governance and delegation such as cluster admins can define a virtual host /eng and delegate implementation explicitly to the eng namespace, and this prevents others from overriding that route path.

The Istio community, also based on Envoy like Heptio Contour, are also defining Ingress CRDs.

It will be fascinating to see how Ingress evolves in the not too distant future.

Related reading: API Gateways are going through an identity crisis.

Demo Time

I find it helpful to see working code to help make concepts more real, so let’s run through a few examples of Ingress and beyond.

For this example, I’m going to use a Kubernetes service created from https://jsonplaceholder.typicode.com/, which provides a quick set of REST APIs that provide different JSON output that can be helpful for testing. It’s based on a Node.js json-server - it’s very cool and worth looking at independently. I forked the original GitHub jsonplaceholder repository, ran draft create on the project, and made a couple of tweaks to the generated Helm chart. Draft is a super fast and easy way to bootstrap existing code into Kubernetes. I’m running all of this example locally using minikube.

The jsonplaceholder service comes with six common resources each of which returns several JSON objects. For this example, we’ll be getting the first user resource at /users/1.

  • /posts 100 posts
  • /comments 500 comments
  • /albums 100 albums
  • /photos 5000 photos
  • /todos 200 todos
  • /users 10 users

Following is a script to try this example yourself, and there’s also an asciinema playback so you can see what it looks like running on my machine. We’ll unpack what’s happening following the playback.

# Install tooling
brew update
brew cask install minikube
brew install kubernetes-cli \
  kubernetes-helm \
  azure/draft/draft \
  glooctl

# Create and set up local Kubernetes Cluster
minikube start
helm init
draft init
glooctl install ingress

# Draft runs better locally if you configure
# against minikube docker daemon
eval $(minikube docker-env)

# Get and run the example
git clone https://github.com/scranton/jsonplaceholder.git
cd jsonplaceholder
draft up

# Validate all is running
kubectl get all --namespace default
kubectl get all --namespace gloo-system
kubectl get ingress --namespace default
curl --header "Host: gloo.example.com" \
  $(glooctl proxy url --name ingress-proxy)/users/1

What Happened?

We installed local tooling (you can check respective websites for full install details)

We then started up a local Kubernetes cluster (minikube) and initialized Helm and Draft. We also installed Gloo ingress into our local cluster.

We then git clone our example and used draft up to build and deploy it to our cluster. Let’s spend a minute on what happened in this step. I originally forked the jsonplaceholder GitHub repository and ran draft create against its code. Draft autodetects the source code language, in this case, Node.js, and creates both a Dockerfile that builds our example application into an image container and creates a default Helm chart. I then made a few minor tweaks to the Helm chart to enable its Ingress. Let’s look at that Ingress manifest. The main changes are the addition of the ingress.class: gloo annotation to mark this Ingress for Gloo’s Ingress Controller. And the host is set to gloo.example.com, which is why our curl statement set curl --header "Host: gloo.example.com".

{{- if .Values.ingress.enabled -}}
apiVersion: extensions/v1beta1
kind: Ingress
metadata:
  name: {{ template "fullname" . }}
  labels:
    chart: "{{ .Chart.Name }}-{{ .Chart.Version | replace "+" "_" }}"
  annotations:
    kubernetes.io/ingress.class: {{ .Values.ingress.class }}
spec:
  rules:
  - host: {{ .Values.ingress.basedomain }}
    http:
      paths:
      - path: /.*
        backend:
          serviceName: {{ template "fullname" . }}
          servicePort: {{ .Values.service.externalPort }}
{{- end -}}
charts/template/ingress.yaml

For more examples of using Gloo as an basic Ingress controller you can check out Kubernetes Ingress Control using Gloo.

You may have also noticed the call to $(glooctl proxy url --name ingress-proxy) in the curl command. This is needed when you’re running in a local environment like minikube and you need to get the host IP and port of the Gloo proxy server. When Gloo is deployed to a Cloud Provider like Google or AWS, then those environments would associate a static IP and allow port 80 (or port 443 for HTTPS) to be used, and that static IP would be registered with a DNS server, i.e., when Gloo is deployed to a cloud-managed Kubernetes you could do curl http://gloo.example.com/users/1.

Ingress Example Challenges

Let’s say we wanted to remap the exiting /users/1 to /people/1 as users are people too. That becomes tricky with Ingress manifests as we can set up a second rule for /people, but we need to rewrite that path to /users before sending to our service as it doesn’t know how to handle requests for /people. If you were using the NGNIX ingress, you could add another annotation nginx.ingress.kubernetes.io/rewrite-target: /, but now we’re adding implementation specific annotations, that is, the nginx annotation won’t be recognized by other Ingress Controllers. And annotations are a flat name space so adding lots of annotations can get quite messy, which is part of why Custom Resources (CRD) was created. Let’s see what the original route, and our path re-writing route, would look like in a CRD based Ingress: Gloo.

Gloo Virtual Services

Gloo uses a concept called Virtual Service that is derived from similar ideas in Istio and Envoy and is conceptually equivalent to an Ingress resource. Easiest to show you the equivalent of the example Ingress we’ve created so far in a Gloo Virtual Service.

apiVersion: gateway.solo.io/v1
kind: VirtualService
metadata:
  name: default
  namespace: gloo-system
spec:
  virtualHost:
    domains:
    - gloo.example.com
    routes:
    - matcher:
        prefix: /
      routeAction:
        single:
          upstream:
            name: default-jsonplaceholder-jsonplaceholder-8080
            namespace: gloo-system

You’ll notice that it looks very similar to the Ingress we had previously created with a few subtle changes. The path specifier is prefix: / which is generally what people intend, i.e., if the beginning of the request message path matches the route path specifier than apply the route actions. If we wanted to exactly match the previous Ingress, we could use regex: /.* instead. Virtual Services allow you to specify paths by: prefix, exact, and regular expression. You can also see that instead of backend: with serviceName and servicePort, a Virtual Service has a routeAction that delegates to a single upstream. Gloo upstreams are auto-discovered and can refer to Kubernetes Services AND REST/gRPC function, cloud functions like AWS Lambda and Google Functions, and other external to Kubernetes services.

More details on Gloo at:

Let’s go back to our example, and update our Virtual Service to do the path rewrite we wanted, i.e., /people => /users

apiVersion: gateway.solo.io/v1
kind: VirtualService
metadata:
  name: default
  namespace: gloo-system
spec:
  virtualHost:
    domains:
    - gloo.example.com
    routes:
    - matcher:
        prefix: /people
      routeAction:
        single:
          upstream:
            name: default-jsonplaceholder-jsonplaceholder-8080
            namespace: gloo-system
      routePlugins:
        prefixRewrite:
          prefixRewrite: /users
    - matcher:
        prefix: /
      routeAction:
        single:
          upstream:
            name: default-jsonplaceholder-jsonplaceholder-8080
            namespace: gloo-system

We’ve added a second route matcher, just like adding a second route path in an Ingress, and specified prefix: /people. This will match all requests that start with /people, and all other calls to the gloo.example.com domain will be handled by the other route matcher. We also added a routePlugins section that will rewrite the request path to /users such that our service will now correctly handle our request. Route Plugins allow you to perform many operations on both the request to the upstream service and the response back from the upstream service. Best shown with an example, so for our new /people route let’s also transform the response to both add a new header x-test-phone with a value from the response body, and let’s transform the response body to return a couple of fields: name, and the address/street and address/city.

apiVersion: gateway.solo.io/v1
kind: VirtualService
metadata:
  creationTimestamp: "2019-04-08T21:43:45Z"
  generation: 1
  name: default
  namespace: gloo-system
  resourceVersion: "772"
  selfLink: /apis/gateway.solo.io/v1/namespaces/gloo-system/virtualservices/default
  uid: 6267ee31-5a47-11e9-bc30-867df7be8a8a
spec:
  virtualHost:
    domains:
    - gloo.example.com
    routes:
    - matcher:
        prefix: /people
      routeAction:
        single:
          upstream:
            name: default-jsonplaceholder-jsonplaceholder-8080
            namespace: gloo-system
      routePlugins:
        prefixRewrite:
          prefixRewrite: /users
        transformations:
          responseTransformation:
            transformation_template:
              body:
                text: '{ "name": "{{ name }}", "address":
                  { "street": "{{ address.street }}",
                    "city": "{{ address.city }}" } }'
              headers:
                x-test-phone:
                  text: '{{ phone }}'
    - matcher:
        prefix: /
      routeAction:
        single:
          upstream:
            name: default-jsonplaceholder-jsonplaceholder-8080
            namespace: gloo-system

Let’s see what that looks like. My example GitHub repository already included the full Gloo Virtual Service we just examined. We need to configure Gloo for gateway which means adding another proxy to handle Virtual Services in addition to Ingress resources. We’ll use draft up to ensure our example is fully deployed including the full Virtual Service, and then we’ll call both /users/1 and /people/1 to see the differences.

# Install Gloo and update example
glooctl install gateway
draft up

# Call service
curl --verbose --header "Host: gloo.example.com" \
  $(glooctl proxy url --name gateway-proxy)/users/1

curl --verbose --header "Host: gloo.example.com" \
  $(glooctl proxy url --name gateway-proxy)/people/1

Mind Blown

Ok, well not that mind-blowing if you’ve used other L7 networking products or done other integration work, but still pretty cool relative to standard Ingress objects. Gloo is using Inja Templates to process the JSON response body. More details in the Gloo documentation.

Summary

In this article, we touched on some of the history and difficulties with the existing Kubernetes Ingress resources. Ingress resources continue to play a role within Kubernetes deployments despite the many challenges that annotation-based extensions have. Kubernetes Custom Resources (CRDs) was created to address some of those extension challenges and can provide a cleaner way to extend Kubernetes as you saw in the Gloo Ingress and Gateway examples. I’m a big believer in the potential of Envoy based solutions as are others in the Istio and Contour communities, and it will be exciting to see how the Kubernetes community decides to evolve Ingress after they finally move the existing resource spec to GA status.

Automating your Services with Knative and Solo.io Gloo

Knative is talked about a great deal, especially around how its capabilities can help provide more standard building blocks on top of Kubernetes for building microservices and serverless like services, e.g., scale to zero, and scale on demand. Knative high level has three capability areas: building, serving, and eventing. This post will provide some examples around Knative Build and Knative Serving with Solo.io Gloo.

Knative Serving initially included all of Istio only to use a small fraction of its capabilities around being a Kubernetes cluster ingress. Recently the Knative team added Solo.io Gloo as an alternative to Istio. More details are available in Gloo, Knative and the future of Serverless and Gloo, by Solo.io, is the first alternative to Istio on Knative.

This post shows a quick example of Knative Building, Knative Serving, and Gloo integration.

All of the Kubernetes Manifests are located in the following GitHub repository https://github.com/scranton/helloworld-knative. I encourage you to fork that repository to help you try these examples yourself.

Setup

These instructions assume you are running on a clean, recent minikube install locally, and that you also have kubectl available locally.

Install Gloo

On Mac or Linux, the quickest option is to use Homebrew. Full Gloo install instructions at Gloo documentation.

brew install glooctl

Then assuming you’ve got a running minikube, and kubectl set up against that minikube instance, i.e., kubectl config current-context returns minikube, run the following to install Gloo with Knative Serving.

glooctl install knative

Deploy existing example image

I’ve already built this example, and have hosted the image publicly in my Docker Hub repository. To use Knative to serve up this existing image, you need to do the following command.

kubectl apply --filename service.yaml

Verify the domain URL for the service. It should be helloworld-go.default.example.com.

kubectl get kservice helloworld-go \
  --namespace default \
  --output=custom-columns=NAME:.metadata.name,DOMAIN:.status.domain

And call the service. Note: the curl --connect-to option is only required when calling locally against minikube as that option will add the correct host and sni headers to the request, and send the request to the host and port pair returned from glooctl proxy address.

curl --connect-to helloworld-go.default.example.com:80:$(glooctl proxy address --name clusteringress-proxy) http://helloworld-go.default.example.com

To clean up, delete the resources.

kubectl delete --filename service.yaml

Build locally, and deploy using Knative Serving

Run docker build with your Docker Hub username.

docker build -t ${DOCKER_USERNAME}/helloworld-go .
docker push ${DOCKER_USERNAME}/helloworld-go

Deploy the service. Again, make sure you updated username in service.yaml file, i.e., replace image reference docker.io/scottcranton/helloworld-go with your Docker Hub username.

kubectl apply --filename service.yaml

Verify domain URL for service. Should be helloworld-go.default.example.com.

kubectl get kservice helloworld-go \
  --namespace default \
  --output=custom-columns=NAME:.metadata.name,DOMAIN:.status.domain

And test your service.

curl --connect-to helloworld-go.default.example.com:80:$(glooctl proxy address --name clusteringress-proxy) http://helloworld-go.default.example.com

To clean up, delete the resources.

kubectl delete --filename service.yaml

Build using Knative Build, and deploy using Knative Serving

To install Knative Build, do the following. I’m using the kaniko build template, so you’ll also need to install that as well.

kubectl apply \
  --filename https://github.com/knative/build/releases/download/v0.4.0/build.yaml

kubectl apply \
  --filename https://raw.githubusercontent.com/knative/build-templates/master/kaniko/kaniko.yaml

To verify the Knative Build install, do the following.

kubectl get pods --namespace knative-build

I’d encourage forking my example GitHub repository https://github.com/scranton/helloworld-knative, so you can push code changes and see them in your environment.

Create a Kubernetes secret for your Docker Hub account that will allow Knative build to push your image. You also need to annotate the secret to indicate it’s for Docker. More details in Guiding credential selection.

kubectl create secret generic basic-user-pass \
  --type="kubernetes.io/basic-auth" \
  --from-literal=username=${DOCKER_USERNAME} \
  --from-literal=password=${DOCKER_PASSWORD}

kubectl annotate secret basic-user-pass \
  build.knative.dev/docker-0=https://index.docker.io/v1/

It should result in a secret like the following.

kubectl describe secret basic-user-pass

Name:         basic-user-pass
Namespace:    default
Labels:       <none>
Annotations:  build.knative.dev/docker-0: https://index.docker.io/v1/

Type:  kubernetes.io/basic-auth

Data
====
username:  12 bytes
password:  24 bytes

Verify that serviceaccount.yaml references your secret.

apiVersion: v1
kind: ServiceAccount
metadata:
  name: build-bot
secrets:
  - name: basic-user-pass

Update service-build.yaml with your GitHub and Docker usernames. This manifest will use Knative Build to create an image using the kaniko-build build template and deploy the service using Knative Serving with Gloo.

apiVersion: serving.knative.dev/v1alpha1
kind: Service
metadata:
  name: helloworld-go
  namespace: default
spec:
  runLatest:
    configuration:
      build:
        apiVersion: build.knative.dev/v1alpha1
        kind: Build
        metadata:
          name: kaniko-build
        spec:
          serviceAccountName: build-bot
          source:
            git:
              url: https://github.com/{ GitHub username }/helloworld-knative
              revision: master
          template:
            name: kaniko
            arguments:
              - name: IMAGE
                value: docker.io/{ Docker Hub username }/helloworld-go
          timeout: 10m
      revisionTemplate:
        spec:
          container:
            image: docker.io/{ Docker Hub username }/helloworld-go
            imagePullPolicy: Always
            env:
              - name: TARGET
                value: "Go Sample v1"

To deploy, apply the manifests.

kubectl apply \
  --filename serviceaccount.yaml \
  --filename service-build.yaml

Then you can watch the build and deployment happening.

kubectl get pods --watch

Once you see all the helloworld-go-0000x-deployment-.... pods are ready, then you can Ctrl+C to escape the watch, and then test your deployment.

Verify the domain URL for service. Should be helloworld-go.default.example.com.

kubectl get kservice helloworld-go \
  --namespace default \
  --output=custom-columns=NAME:.metadata.name,DOMAIN:.status.domain

And test your service.

curl --connect-to helloworld-go.default.example.com:80:$(glooctl proxy address --name clusteringress-proxy) http://helloworld-go.default.example.com

Cleanup

kubectl delete \
  --filename serviceaccount.yaml \
  --filename service-build.yaml

kubectl delete secret basic-user-pass

Summary

Hopefully, this post gave you a taste for how Gloo and Knative can work together to provide you with a way to build and deploy your services on demand into Kubernetes.

See Also

Kubernetes Ingress Control using Gloo

Kubernetes is excellent and makes it easier to create and manage highly distributed applications. A challenge then is how do you share your great Kubernetes hosted applications with the rest of the world. Many lean towards Kubernetes Ingress objects and this article will show you how to use the open source Solo.io Gloo to fill this need.

Gloo as Ingress

Gloo is a function gateway that gives users many benefits including sophisticated function level routing, and extensive service discovery with the introspection of OpenAPI (Swagger) definitions, gRPC reflection, Lambda discovery and more. Gloo can act as an Ingress Controller, that is, by routing Kubernetes external traffic to Kubernetes cluster hosted services based on the path routing rules defined in an Ingress Object. I’m a big believer in showing technology through examples, so let’s quickly run through an example to show you what’s possible.

Prerequisites

This example assumes you’re running on a local minikube instance, and that you also have kubectl also running. You can run this same example on your favorite cloud provider managed Kubernetes cluster; you’d need to make a few tweaks. You’ll also need Gloo installed. Let’s use Homebrew to set all of this up for us, and then start minikube and install Gloo. It will take a few minutes to download and install everything to your local machine, and get everything started.

brew update
brew cask install minikube
brew install kubectl glooctl curl

minikube start
glooctl install ingress

One more thing before we dive into Ingress objects, let’s set up an example service deployed on Kubernetes that we can reference.

kubectl apply \
  --filename https://raw.githubusercontent.com/solo-io/gloo/master/example/petstore/petstore.yaml

Setting up an Ingress to our example Petstore

Let’s set up an Ingress object that routes all HTTP traffic to our petstore service. To make this a little more exciting and challenging, and who doesn’t like a good tech challenge, let’s also configure a host domain, which will require a little extra curl magic to call correctly on our local Kubernetes cluster. The following Ingress definition will route all requests to http://gloo.example.com to our petstore service listening on port 8080 within our cluster. The petstore service provides some REST functions listening on the query path /api/pets that will return JSON for the inventory of pets in our (small) store.

If you are trying this example in a public cloud Kubernetes instance, you’ll most likely need to configure a Cloud Load Balancer. Make sure you configure that Load Balancer for the service/ingress-proxy running in the gloo-system namespace.

The important details of our example Ingress definition are:

  • Annotation kubernetes.io/ingress.class: gloo which is the standard way to mark an Ingress object as handled by a specific Ingress controller, i.e., Gloo. This requirement will go away soon as we add the ability for Gloo to be the cluster default Ingress controller
  • Path wildcard /.* to indicate that all traffic to http://gloo.example.com is routed to our petstore service
cat <<EOF | kubectl apply --filename -
apiVersion: extensions/v1beta1
kind: Ingress
metadata:
 name: petstore-ingress
 annotations:
    kubernetes.io/ingress.class: gloo
spec:
  rules:
  - host: gloo.example.com
    http:
      paths:
      - path: /.*
        backend:
          serviceName: petstore
          servicePort: 8080
EOF

We can validate that Kubernetes created our Ingress correctly by the following command.

kubectl get ingress petstore-ingress

NAME               HOSTS              ADDRESS   PORTS   AGE
petstore-ingress   gloo.example.com             80      14h

To test we’ll use curl to call our local cluster. Like I said earlier, by defining a host: gloo.example.com in our Ingress, we need to do a little more to call this without doing things with DNS or our local /etc/hosts file. I’m going to use the recent curl --connect-to options, and you can read more about that at the curl man pages.

The glooctl command-line tool helps us get the local host IP and port for the proxy with the glooctl proxy address --name <ingress name> --port http command. It returns the address (host IP:port) to the Gloo Ingress proxy that allows us external access to our local Kuberbetes cluster. If you are trying this example in a public cloud managed Kuberbetes, then most will handle the DNS mapping for your specified domain (that you should own), and the Gloo Ingress service, so in that case, you do NOT need the --connect-to magic, just curl http://gloo.example.com/api/pets should work.

curl --connect-to gloo.example.com:80:$(glooctl proxy address --name ingress-proxy --port http) \
    http://gloo.example.com/api/pets

Which should return the following JSON

[{"id":1,"name":"Dog","status":"available"},{"id":2,"name":"Cat","status":"pending"}]

TLS Configuration

These days, most want to use TLS to secure your communications. Gloo Ingress can act as a TLS terminator, and we’ll quickly run through what that set up would look like.

Any Kubernetes Ingress doing TLS will need a Kubernetes TLS secret created, so let’s create a self-signed certificate we can use for our example gloo.example.com domain. The following two commands will produce a certificate and generate a TLS secret named my-tls-secret in minikube.

openssl req -x509 -nodes -days 365 -newkey rsa:2048 -keyout my_key.key -out my_cert.cert -subj "/CN=gloo.example.com/O=gloo.example.com"

kubectl create secret tls my-tls-secret --key my_key.key --cert my_cert.cert

Now let’s update our Ingress object with the needed TLS configuration. Important that the TLS host and the rules host match, and the secretName matches the name of the Kubernetes secret deployed previously.

cat <<EOF | kubectl apply --filename -
apiVersion: extensions/v1beta1
kind: Ingress
metadata:
  name: petstore-ingress
  annotations:
    kubernetes.io/ingress.class: gloo
spec:
  tls:
  - hosts:
    - gloo.example.com
    secretName: my-tls-secret
  rules:
  - host: gloo.example.com
    http:
      paths:
      - path: /.*
        backend:
          serviceName: petstore
          servicePort: 8080
EOF

If all went well, we should have changed our petstore to now be listening to https://gloo.example.com. Let’s try it, again using our curl magic, which we need to both resolve the host and port as well as to validate our certificate. Notice that we’re asking glooctl for --port https this time, and we’re curling https://gloo.example.com on port 443. We’ll also have curl validate our TLS certificate using curl --cacert <my_cert.cert> with the certificate we created and used in our Kubernetes secret.

curl --cacert my_cert.cert \
    --connect-to gloo.example.com:443:$(glooctl proxy address --name ingress-proxy --port https) \
    https://gloo.example.com/api/pets

Next Steps

This was a quick tour of how Gloo can act as your Kubernetes Ingress controller making very minimal changes to your existing Kubernetes manifests. Please try it out and let us know what you think at our community Slack channel.

If you’re interested in powering up you Gloo superpowers, try Gloo in gateway mode glooctl install gateway, which unlocks a set of Kubernetes CRDs (Custom Resources) that give you a more standard, and far more powerful, way of doing more advanced traffic shifting, rate limiting, and more without the annotation smell in your Kubernetes cluster. Check out these other articles for more details on Gloo’s extra powers.

Canary Deployments with Gloo Function Gateway using Weighted Destinations

Photo by Form.

This is the 3rd post in my 3 part series on doing Canary Releases with Solo.io Gloo.

This post will show a different way of doing Canary release by using weighted routes to send a fraction of the request traffic to the new version (the canary). For example, you could initially route 5% of your request traffic to your new version to validate that its working correctly in production without risking too much if your new version fails. As you gain confidence in your new version, you can route more and more traffic to it until you cut over completely, i.e. 100% to new version, and decommission the old version.

All of the Kubernetes manifests are located at https://github.com/scranton/gloo-canary-example. I’d suggest you clone that repo locally to make it easier to try these example yourself. All command examples assume you are in the top level directory of that repo.

Review

Quickly reviewing the previous 2 posts, we learned that Gloo can help with function level routing, and that routing can be used as part of a Canary Release process, that is slowly testing a new version of our service in an environment. In the last post, we used Gloo to create a special routing rule to our new version that only forwarded on requests that included a specific request header. That allows us to deploy our new service into production, while only allowing request traffic from specific clients, i.e. clients that know to set that specific request header. Once we got confident that our new version was working as expected, we then changed the Gloo routing rules so that all request traffic went to the new service. This is a great way to validate that our new deployment is correctly configured in our environment before sending any important traffic to it.

In this post, we’re going to expand on that approach with a more sophisticated pattern - weighted routes. With this capability we can route a percentage of the request traffic to one or more functions. This enhances our previous header based approach as we can now validate that our new service can handle a managed load of traffic, and as we gain confidence we can route higher loads to the new version till its handling 100% of the request traffic. If at any point, we see errors we can either rollback 100% of traffic to the original working version OR debug our service to better understand why it started to have problems handling a faction of our target load, which in theory should help us fix our new service version quicker.

You can always combine both the header routing and weighted destination routing, and other routing options Gloo provides.

Setup

This post assumes you’ve already run thru the Canary Deployments with Gloo Function Gateway post, and that you’ve already got a Kubernetes environment setup with Gloo. If not, please refer back to that post for setup instructions and the basics of VirtualServices and Routes with Gloo.

By the end of that post, we had 100% of findPets function traffic going to our petstore-v2 service, and the other functions going to the original petstore-v1. Let’s validate our services before we make any changes.

export PROXY_URL=$(glooctl proxy url)
curl ${PROXY_URL}/findPets

The call to findPets should have been routed to petstore-v2, which should return the following result.

[{"id":1,"name":"Dog","status":"v2"},{"id":2,"name":"Cat","status":"v2"},{"id":3,"name":"Parrot","status":"v2"}]

And calls to findPetWithId should route to petstore-v1, which only has 2 pets (Dog & Cat) each with a status of available and pending respectively (versus status of v2 for petstore-v2 responses).

curl ${PROXY_URL}/findPetWithId/1
{"id":1,"name":"Dog","status":"available"}
curl ${PROXY_URL}/findPetWithId/2
{"id":2,"name":"Cat","status":"pending"}
curl ${PROXY_URL}/findPetWithId/3
{"code":404,"message":"not found: pet 3"}

So let’s play with doing a Canary Release with weighted destinations to migrate the findPetWithId function.

Setting up Weighted Destinations in Gloo

Let’s start by looking at our existing, virtual service coalmine

kubectl get virtualservice coalmine --namespace gloo-system --output yaml
apiVersion: gateway.solo.io/v1
kind: VirtualService
metadata:
  name: coalmine
  namespace: gloo-system
spec:
  displayName: coalmine
  virtualHost:
    domains:
    - '*'
    name: gloo-system.coalmine
    routes:
    - matcher:
        prefix: /findPets
      routeAction:
        single:
          destinationSpec:
            rest:
              functionName: findPets
              parameters: {}
          upstream:
            name: default-petstore-v2-8080
            namespace: gloo-system
    - matcher:
        prefix: /findPetWithId
      routeAction:
        single:
          destinationSpec:
            rest:
              functionName: findPetById
              parameters:
                headers:
                  :path: /findPetWithId/{id}
          upstream:
            name: default-petstore-v1-8080
            namespace: gloo-system
    - matcher:
        prefix: /petstore
      routeAction:
        single:
          upstream:
            name: default-petstore-v1-8080
            namespace: gloo-system
      routePlugins:
        prefixRewrite:
          prefixRewrite: /api/pets/

To create a weighted destination, we need to change the routeAction from single to multi and provide 2+ destination, which are destinationSpec with weight. For example, to route 10% of request traffic to findPetWithId to petstore-v2 and the remaining 90% to petstore-v1.

kubectl apply -f coalmine-virtual-service-part-3-weighted.yaml

Here’s the relevant part of the virtual service manifest showing the weighted destination spec.

coalmine-virtual-service-part-3-weighted.yaml view raw
  routeAction:
    multi:
      destinations:
      - destination:
          destinationSpec:
            rest:
              functionName: findPetById
              parameters:
                headers:
                  :path: /findPetWithId/{id}
          upstream:
            name: default-petstore-v2-8080
            namespace: gloo-system
        weight: 10
      - destination:
          destinationSpec:
            rest:
              functionName: findPetById
              parameters:
                headers:
                  :path: /findPetWithId/{id}
          upstream:
            name: default-petstore-v1-8080
            namespace: gloo-system
        weight: 90
- matcher:

Let’s run a shell loop to test, remember that petstore-v2 responses have a status field of v2. The following command will call our function 20 times, and we should see ~2 responses (~10%) return with "status":"v2".

COUNTER=0
while [ $COUNTER -lt 20 ]; do
    curl ${PROXY_URL}/findPetWithId/1
    let COUNTER=COUNTER+1
done
{"id":1,"name":"Dog","status":"available"}
{"id":1,"name":"Dog","status":"v2"}
{"id":1,"name":"Dog","status":"available"}
{"id":1,"name":"Dog","status":"v2"}
{"id":1,"name":"Dog","status":"available"}

Now if we want to increase the traffic to our new version, we just need to update the weight attibutes in the 2 destination objects. Gloo sums all of the weight values within a given weighted destination route, and routes the respective percentage to each destination. So if we set both route weights to 1 then each route would get 1/2 or 50% of the request traffic. I’d recommend setting the values with a sum of 100 so they look like percentages for greater readability. The following example will update our routes to do 50/50 traffic split.

kubectl apply -f coalmine-virtual-service-part-3-weighted-50-50.yaml
coalmine-virtual-service-part-3-weighted-50-50.yaml view raw
  routeAction:
    multi:
      destinations:
      - destination:
          destinationSpec:
            rest:
              functionName: findPetById
              parameters:
                headers:
                  :path: /findPetWithId/{id}
          upstream:
            name: default-petstore-v2-8080
            namespace: gloo-system
        weight: 50
      - destination:
          destinationSpec:
            rest:
              functionName: findPetById
              parameters:
                headers:
                  :path: /findPetWithId/{id}
          upstream:
            name: default-petstore-v1-8080
            namespace: gloo-system
        weight: 50
- matcher:

And if we run our test loop again, we should see about 10 of the 20 requests returning "status":"v2.

COUNTER=0
while [ $COUNTER -lt 20 ]; do
    curl ${PROXY_URL}/findPetWithId/1
    let COUNTER=COUNTER+1
done
{"id":1,"name":"Dog","status":"v2"}
{"id":1,"name":"Dog","status":"available"}
{"id":1,"name":"Dog","status":"v2"}
{"id":1,"name":"Dog","status":"available"}
{"id":1,"name":"Dog","status":"v2"}
{"id":1,"name":"Dog","status":"available"}
{"id":1,"name":"Dog","status":"v2"}
{"id":1,"name":"Dog","status":"available"}
{"id":1,"name":"Dog","status":"v2"}
{"id":1,"name":"Dog","status":"available"}
{"id":1,"name":"Dog","status":"v2"}

Summary

This series has hopefully given you all a taste of how Solo.io Gloo can help you create more interesting applications, and also enhance your application delivery approaches. These posts have shown how to do function level request routing, and how you can enhance those routing rules by requiring presence of request headers and doing managed load balancing by specifying the percentage of traffic going to individual upstream destinations. Gloo supports many more options, and I hope you’ll continue your journey by going to https://gloo.solo.io to learn more.

Canary Deployments with Gloo Function Gateway

Photo by Zab Consulting.

This is the 2nd post in my 3 part series on doing Canary Releases with Solo.io Gloo.

This post expands on the Function Routing with Gloo post to show you how to do a Canary release of a new version of a function. Gloo is a function gateway that gives users a number of benefits including sophisticated function level routing, and deep service discovery with introspection of OpenAPI (Swagger) definitions, gRPC reflection, Lambda discovery and more. This post will show a simple example of Gloo discovering 2 different deployments of a service, and setting up some routes. The route rules will use the presence of a request header x-canary:true to influence runtime routing to either version 1 or version 2 of our function. Then once we’re happy with our new version, we will update the route so all requests now go to version 2 of our service. All without changing or even redeploying our 2 services. But first, let’s set some context…

Background

Canary release is a technique to reduce the risk of introducing a new software version in production by slowly rolling out the change to a small subset of users before rolling it out to the entire infrastructure and making it available to everybody.

Danilo Sato Canary Release

The idea of a Canary release is that no matter how much testing you do on a new implementation, until you deploy it into your production environment you can’t be positive everything will work as expected. So having a way to release a new version into production concurrently with the existing version(s) with some way to route traffic can be helpful. Ideally, we’d like to route most traffic to existing, known to work version, and have a way for some (test) requests go to the new version. Once you’re feeling comfortable that your new version is working like you expect, then and only then, do you start routing most/all requests to the new version, and then eventually decommission the original service.

Being able to change request routes without needing to change or redeploy your code, I think, is very helpful in building confidence that your code is ready for production. That is, if you need to change your code or use a code based feature flag, then your exercising different code paths and/or changing deployed configuration settings. I feel its better if you can deploy your service, code and configurations, all ready for production, and use an external mechanism to manage request routing.

Gloo uses Envoy, which is a super high performance service proxy, to do the request routing. In this example, we’ll use a request header to influence the routing, though we could also use other variables like the IP range of the requestor to drive routing decisions. That is, if requests are coming from specific test machines we can route them to our new version. Lots more information on how Gloo and Envoy works can be found on the Solo.io website. On to the example…

This post assumes you’ve already run thru the Function Routing with Gloo post, and that you’ve already got a Kubernetes environment setup with Gloo. If not, please refer back to that post for setup instructions and the basics of VirtualServices and Routes with Gloo.

All of the Kubernetes manifests are located at https://github.com/scranton/gloo-canary-example. I’d suggest you clone that repo locally to make it easier to try these example yourself. All command examples assume you are in the top level directory of that repo.

Review

In the previous post, we had a single service petstore-v1, and we setup Gloo to route requests to its findPets REST function. Let’s test that its still working as expected. Remember we need to get Gloo’s proxy url by calling the glooctl proxy url command, and then we can make requests against that with the /findPets route that we previously setup. If still working correctly we should get 2 Pets back.

export PROXY_URL=$(glooctl proxy url)
curl ${PROXY_URL}/findPets
[{"id":1,"name":"Dog","status":"available"},{"id":2,"name":"Cat","status":"pending"}]

Canary Routing

Now let’s deploy a version 2 of our service, and let’s setup a canary route for the findPets function. That is, by default we’ll route to version 1 of the function, and if there is a request header x-canary:true set, we’ll route that request to version 2 of our function.

Install and verify petstore version 2 example service

Let’s first deploy version 2 of our petstore service. This version has been modified to return 3 pets.

kubectl apply -f petstore-v2.yaml
petstore-v2.yaml view raw
---
# petstore-v2
apiVersion: v1
kind: Service
metadata:
 name: petstore-v2
 namespace: default
 labels:
   app: petstore-v2
spec:
 type: ClusterIP
 ports:
 - name: http
   port: 8080
   targetPort: 8080
   protocol: TCP
 selector:
   app: petstore-v2
---
apiVersion: apps/v1
kind: Deployment
metadata:
 name: petstore-v2
 namespace: default
 labels:
   app: petstore-v2
spec:
 replicas: 1
 selector:
   matchLabels:
     app: petstore-v2
 template:
   metadata:
     labels:
       app: petstore-v2
   spec:
     containers:
     - name: petstore-v2
       image: scottcranton/petstore:v2
       ports:
       - containerPort: 8080

Verify its setup right

kubectl get services --namespace default
NAME          TYPE        CLUSTER-IP      EXTERNAL-IP   PORT(S)    AGE
kubernetes    ClusterIP   10.96.0.1       <none>        443/TCP    22h
petstore-v1   ClusterIP   10.110.99.86    <none>        8080/TCP   33m
petstore-v2   ClusterIP   10.109.91.120   <none>        8080/TCP   6s

Now let’s setup a port forward to see if it works. When we do a GET against /api/pets we should get back 3 pets.

kubectl port-forward services/petstore-v2 8080:8080

And in a different terminal, run the following to see if we get back 3 pets for version 2 of our service.

curl localhost:8080/api/pets
[{"id":1,"name":"Dog","status":"v2"},{"id":2,"name":"Cat","status":"v2"},{"id":3,"name":"Parrot","status":"v2"}]

You should kill all port forwarding as we’ll use Gloo to proxy future tests.

Setup Canary Route

Let’s setup a new function route rule for petstore version 2 findPets function that depends on the presence of the x-canary:true request header.

glooctl add route \
   --name coalmine \
   --path-prefix /findPets \
   --dest-name default-petstore-v2-8080 \
   --rest-function-name findPets \
   --header x-canary=true

Default routing should still go to petstore version 1, and return only 2 pets.

curl ${PROXY_URL}/findPets
[{"id":1,"name":"Dog","status":"available"},{"id":2,"name":"Cat","status":"pending"}]

If we make a request with the x-canary:true set, it should route to petstore version 2, and return 3 pets.

curl -H "x-canary:true" ${PROXY_URL}/findPets
[{"id":1,"name":"Dog","status":"v2"},{"id":2,"name":"Cat","status":"v2"},{"id":3,"name":"Parrot","status":"v2"}]

Just to verify, let’s set the header to a different value, e.g. x-canary:false to see that it routes to petstore v1

curl -H "x-canary:false" ${PROXY_URL}/findPets
[{"id":1,"name":"Dog","status":"available"},{"id":2,"name":"Cat","status":"pending"}]

Here’s the complete YAML for our coalmine virtual service that you could kubectl apply if you wanted to recreate

coalmine-virtual-service-part-2-header.yaml view raw
apiVersion: gateway.solo.io/v1
kind: VirtualService
metadata:
  name: coalmine
  namespace: gloo-system
spec:
  displayName: coalmine
  virtualHost:
    domains:
    - '*'
    name: gloo-system.coalmine
    routes:
    - matcher:
        headers:
        - name: x-canary
          regex: true
          value: "true"
        prefix: /findPets
      routeAction:
        single:
          destinationSpec:
            rest:
              functionName: findPets
              parameters: {}
          upstream:
            name: default-petstore-v2-8080
            namespace: gloo-system
    - matcher:
        prefix: /findPetWithId
      routeAction:
        single:
          destinationSpec:
            rest:
              functionName: findPetById
              parameters:
                headers:
                  :path: /findPetWithId/{id}
          upstream:
            name: default-petstore-v1-8080
            namespace: gloo-system
    - matcher:
        prefix: /findPets
      routeAction:
        single:
          destinationSpec:
            rest:
              functionName: findPets
              parameters: {}
          upstream:
            name: default-petstore-v1-8080
            namespace: gloo-system
    - matcher:
        prefix: /petstore
      routeAction:
        single:
          upstream:
            name: default-petstore-v1-8080
            namespace: gloo-system
      routePlugins:
        prefixRewrite:
          prefixRewrite: /api/pets

The part of the virtual service manifest that is specifying the header based routing is highlighted as follows.

- matcher:
    headers:
    - name: x-canary
      regex: true
      value: "true"
    prefix: /findPets
  routeAction:

Make version 2 the default for all requests

Once we’re feeling good about version 2 of our function, we can make the default call to /findPets go to version 2. Note that will Gloo as your function gateway, you do not have to route all function requests to version 2 of the petstore service. In this example, we’re only routing requests for the findPets function to version 2. All other requests are going to version 1 of petstore. This partial routing may not always work for all services; this post is showing that Gloo makes this level of granularity possible when it helps you more fine tune your application upgrading decisions. For example, this may make sense if you want to patch a critical bug but are not ready to role out other breaking changes in a new service version.

The easiest way to make change the routing rules to route all requests to version 2 findPets is by applying a YAML file. You can use the glooctl command line tool to add and remove routes, but it takes several calls.

coalmine-virtual-service-part-2-v2.yaml view raw
apiVersion: gateway.solo.io/v1
kind: VirtualService
metadata:
  name: coalmine
  namespace: gloo-system
spec:
  displayName: coalmine
  virtualHost:
    domains:
    - '*'
    name: gloo-system.coalmine
    routes:
    - matcher:
        prefix: /findPets
      routeAction:
        single:
          destinationSpec:
            rest:
              functionName: findPets
              parameters: {}
          upstream:
            name: default-petstore-v2-8080
            namespace: gloo-system
    - matcher:
        prefix: /findPetWithId
      routeAction:
        single:
          destinationSpec:
            rest:
              functionName: findPetById
              parameters:
                headers:
                  :path: /findPetWithId/{id}
          upstream:
            name: default-petstore-v1-8080
            namespace: gloo-system
    - matcher:
        prefix: /petstore
      routeAction:
        single:
          upstream:
            name: default-petstore-v1-8080
            namespace: gloo-system
      routePlugins:
        prefixRewrite:
          prefixRewrite: /api/pets

Summary

This post has shown you have to leverage the Gloo function gateway to do a Canary Release of a new version of a function, and allow you to do very granular function level routing to validate your new function is working correctly. Then it showed changing routing rules so all traffic goes to the new version. All without redeploying either of the 2 service implementations. In this post we used the presence of a request header to influence function routing; we could also have done routing based on IP range of incoming request or other variables. This hopefully shows you the power and flexibility that Gloo function gateway can provide you in your journey to microservices and service mesh.

Routing with Gloo Function Gateway

Photo by Pietro Jeng.

This is the 1st post in my 3 part series on doing Canary Releases with Solo.io Gloo.

This post introduces you to how to use the open source Solo.io Gloo project to help you to route traffic to your Kubernetes hosted services. Gloo is a function gateway that gives users a number of benefits including sophisticated function level routing, and deep service discovery with introspection of OpenAPI (Swagger) definitions, gRPC reflection, Lambda discovery and more. This post will start with a simple example of Gloo discovering and routing requests to a service that exposes REST functions. Later posts will build on this initial example to do highlight ever more complex scenarios.

Prerequisites

I’m assuming you’re already running a Kubernetes installation. I’m assuming you’re using minikube for this post though any recent Kubernetes installation should work as long as you have kubectl setup and configured correctly for your Kubernetes installation.

Setup

Setup example service

All of the Kubernetes manifests are located at https://github.com/scranton/gloo-canary-example. I’d suggest you clone that repo locally to make it easier to try these example yourself. All command examples assume you are in the top level directory of that repo.

Let’s start by installing an example service that exposes 4 REST functions. This service is based on the go-swagger petstore example.

kubectl apply -f petstore-v1.yaml
petstore-v1.yaml view raw
---
# petstore-v1
apiVersion: v1
kind: Service
metadata:
  name: petstore-v1
  namespace: default
  labels:
    app: petstore-v1
spec:
  type: ClusterIP
  ports:
  - name: http
    port: 8080
    targetPort: 8080
    protocol: TCP
  selector:
    app: petstore-v1
---
apiVersion: apps/v1
kind: Deployment
metadata:
  name: petstore-v1
  namespace: default
  labels:
    app: petstore-v1
spec:
  replicas: 1
  selector:
    matchLabels:
      app: petstore-v1
  template:
    metadata:
      labels:
        app: petstore-v1
    spec:
      containers:
      - name: petstore-v1
        image: scottcranton/petstore:v1
        ports:
        - containerPort: 8080

We’ve installing this service into the default namespace, so we can look there to see if it’s installed correctly.

kubectl get all --namespace default
NAME                              READY   STATUS    RESTARTS   AGE
pod/petstore-v1-986747fc8-6hn9p   1/1     Running   0          16s

NAME                  TYPE        CLUSTER-IP     EXTERNAL-IP   PORT(S)    AGE
service/kubernetes    ClusterIP   10.96.0.1      <none>        443/TCP    22h
service/petstore-v1   ClusterIP   10.110.99.86   <none>        8080/TCP   17s

NAME                          READY   UP-TO-DATE   AVAILABLE   AGE
deployment.apps/petstore-v1   1/1     1            1           16s

NAME                                    DESIRED   CURRENT   READY   AGE
replicaset.apps/petstore-v1-986747fc8   1         1         1       16s

Let’s test our service to make sure it installed correctly. This service is setup to expose on port 8080, and will return the list of all pets for GET requests on the query path /api/pets. The easiest way to test is to port-forward the service so we can access it locally. We’ll need the service name for the port forwarding. Make sure the service name matches the ones from your system. This will forward port 8080 from the service running in your Kubernetes installation to your local machine, i.e. localhost:8080.

Get the service names for your installation

kubectl get service --namespace default
NAME          TYPE        CLUSTER-IP     EXTERNAL-IP   PORT(S)    AGE
kubernetes    ClusterIP   10.96.0.1      <none>        443/TCP    22h
petstore-v1   ClusterIP   10.110.99.86   <none>        8080/TCP   42s

Setup the port forwarding

kubectl port-forward service/petstore-v1 8080:8080

In a separate terminal, run the following. The petstore function should return 2 pets: Dog and Cat.

curl localhost:8080/api/pets
[{"id":1,"name":"Dog","status":"available"},{"id":2,"name":"Cat","status":"pending"}]

You can also get the Swagger spec as well.

curl localhost:8080/swagger.json

You can kill all the port forwards. Now we’ll setup Gloo…

Setup Gloo

Let’s setup the Gloo command line utility. Full instructions are at the Gloo doc site. Here are the quick setup instructions.

Setup the glooctl command line tool. This makes installation, upgrade, and operations of Gloo easier. Full installation instructions are located on the https://gloo.solo.io site.

If you’re a Mac or Linux Homebrew user, I’d recommend installing as follows.

brew install glooctl

Now let’s install Gloo into your Kubernetes installation.

glooctl install gateway

Pretty easy, eh? Let’s verify that its installed and running correctly. Gloo by default creates and installs into the gloo-system namespace, so let’s look at everything running there.

kubectl get all --namespace gloo-system

And the output should look something like the following.

NAME                                 READY   STATUS    RESTARTS   AGE
pod/discovery-66c865f9bc-h6v8f       1/1     Running   0          22h
pod/gateway-777cf4486c-8mzj5         1/1     Running   0          22h
pod/gateway-proxy-5f58774ccc-rcmdv   1/1     Running   0          22h
pod/gloo-5c6c4466f-ptc8v             1/1     Running   0          22h

NAME                    TYPE           CLUSTER-IP      EXTERNAL-IP   PORT(S)                      AGE
service/gateway-proxy   LoadBalancer   10.97.13.246    <pending>     80:31333/TCP,443:32470/TCP   22h
service/gloo            ClusterIP      10.104.80.219   <none>        9977/TCP                     22h

NAME                            READY   UP-TO-DATE   AVAILABLE   AGE
deployment.apps/discovery       1/1     1            1           22h
deployment.apps/gateway         1/1     1            1           22h
deployment.apps/gateway-proxy   1/1     1            1           22h
deployment.apps/gloo            1/1     1            1           22h

NAME                                       DESIRED   CURRENT   READY   AGE
replicaset.apps/discovery-66c865f9bc       1         1         1       22h
replicaset.apps/gateway-777cf4486c         1         1         1       22h
replicaset.apps/gateway-proxy-5f58774ccc   1         1         1       22h
replicaset.apps/gloo-5c6c4466f             1         1         1       22h

Routing

Upstreams

Before we get into routing, let’s talk a little about the concept of Upstreams. Upstreams are the services that Gloo has discovered automatically. Let’s look at the upstreams that Gloo has discovered in our Kubernetes cluster.

glooctl get upstreams

You may see some different entries than what follows. It depends on your Kubernetes cluster, and what is running currently.

+-------------------------------+------------+----------+------------------------------+
|           UPSTREAM            |    TYPE    |  STATUS  |           DETAILS            |
+-------------------------------+------------+----------+------------------------------+
| default-kubernetes-443        | Kubernetes | Accepted | svc name:      kubernetes    |
|                               |            |          | svc namespace: default       |
|                               |            |          | port:          443           |
|                               |            |          |                              |
| default-petstore-v1-8080      | Kubernetes | Accepted | svc name:      petstore-v1   |
|                               |            |          | svc namespace: default       |
|                               |            |          | port:          8080          |
|                               |            |          | REST service:                |
|                               |            |          | functions:                   |
|                               |            |          | - addPet                     |
|                               |            |          | - deletePet                  |
|                               |            |          | - findPetById                |
|                               |            |          | - findPets                   |
|                               |            |          |                              |
| gloo-system-gateway-proxy-443 | Kubernetes | Accepted | svc name:      gateway-proxy |
|                               |            |          | svc namespace: gloo-system   |
|                               |            |          | port:          443           |
|                               |            |          |                              |
| gloo-system-gateway-proxy-80  | Kubernetes | Accepted | svc name:      gateway-proxy |
|                               |            |          | svc namespace: gloo-system   |
|                               |            |          | port:          80            |
|                               |            |          |                              |
| gloo-system-gloo-9977         | Kubernetes | Accepted | svc name:      gloo          |
|                               |            |          | svc namespace: gloo-system   |
|                               |            |          | port:          9977          |
|                               |            |          |                              |
| kube-system-kube-dns-53       | Kubernetes | Accepted | svc name:      kube-dns      |
|                               |            |          | svc namespace: kube-system   |
|                               |            |          | port:          53            |
|                               |            |          |                              |
+-------------------------------+------------+----------+------------------------------+

Notice that our petstore service default-petstore-v1-8080 is different from the other upstreams in that its details is listing 4 REST service functions: addPet, deletePet, findPetByID, and findPets. This is because Gloo can auto-detect OpenAPI / Swagger definitions. This allows Gloo to route to individual functions versus what most traditional API Gateways do in only letting you route only to host:port granular services. Let’s see that in action.

Let’s look a little closer at our petstore upstream. The glooctl command let’s us output the full details in yaml or json.

glooctl get upstream default-petstore-v1-8080 --output yaml
discoveryMetadata: {}
metadata:
  annotations:
    kubectl.kubernetes.io/last-applied-configuration: |
      {"apiVersion":"v1","kind":"Service","metadata":{"annotations":{},"labels":{"app":"petstore-v1"},"name":"petstore-v1","namespace":"default"},"spec":{"ports":[{"name":"http","port":8080,"protocol":"TCP","targetPort":8080}],"selector":{"app":"petstore-v1"},"type":"ClusterIP"}}
  labels:
    app: petstore-v1
    discovered_by: kubernetesplugin
  name: default-petstore-v1-8080
  namespace: gloo-system
  resourceVersion: "20387"
status:
  reportedBy: gloo
  state: Accepted
upstreamSpec:
  kube:
    selector:
      app: petstore-v1
    serviceName: petstore-v1
    serviceNamespace: default
    servicePort: 8080
    serviceSpec:
      rest:
        swaggerInfo:
          url: http://petstore-v1.default.svc.cluster.local:8080/swagger.json
        transformations:
          addPet:
            body:
              text: '{"id": {{ default(id, "") }},"name": "{{ default(name, "")}}","tag":
                "{{ default(tag, "")}}"}'
            headers:
              :method:
                text: POST
              :path:
                text: /api/pets
              content-type:
                text: application/json
          deletePet:
            headers:
              :method:
                text: DELETE
              :path:
                text: /api/pets/{{ default(id, "") }}
              content-type:
                text: application/json
          findPetById:
            body: {}
            headers:
              :method:
                text: GET
              :path:
                text: /api/pets/{{ default(id, "") }}
              content-length:
                text: "0"
              content-type: {}
              transfer-encoding: {}
          findPets:
            body: {}
            headers:
              :method:
                text: GET
              :path:
                text: /api/pets?tags={{default(tags, "")}}&limit={{default(limit,
                  "")}}
              content-length:
                text: "0"
              content-type: {}
              transfer-encoding: {}

Here we see that the findPets REST function is looking for requests on /api/pets, and findPetsById is looking for requests on /api/pets/{id} where {id} is the id number of the single pet who’s details are to be returned.

Basic Routing

Gloo acts like an (better) Kubernetes Ingress, which means it can allow requests from external to the Kubernetes cluster to access services running inside the cluster. Gloo uses a concept called VirtualService to setup routes to Kubernetes hosted services.

This post will show you how to configure Gloo using the command line tools, and I’ll explain a little of what’s happening with each command. I’ll also include the YAML at the end of each step if you’d prefer to work in a purely declarative fashion (versus imperative commands).

Setup VirtualService. This gives us a place to define a set of related routes. This won’t do much till we create some routes in the next steps.

glooctl create virtualservice --name coalmine

Here’s the YAML that will create the same resource as the glooctl command we just ran. Note that by default the glooctl command creates resources in the gloo-system namespace.

apiVersion: gateway.solo.io/v1
kind: VirtualService
metadata:
  name: coalmine
  namespace: gloo-system
spec:
  displayName: coalmine
  virtualHost:
    domains:
    - '*'
    name: gloo-system.coalmine

Create a route for all traffic to go to our service.

glooctl add route \
  --name coalmine \
  --path-prefix /petstore \
  --dest-name default-petstore-v1-8080 \
  --prefix-rewrite /api/pets

This sets up a simple ingress route so that all requests going to the Gloo Proxy / URL are redirected to the default-petstore-v1-8080 service /api/pets. Let’s test it. To get the Gloo proxy host and port number (remember that Gloo is acting like a Kubernetes Ingress), we need to call glooctl proxy url. Then let’s call the route path.

export PROXY_URL=$(glooctl proxy url)
curl ${PROXY_URL}/petstore

And we should see the same results as when we called the port forwarded service.

[{"id":1,"name":"Dog","status":"available"},{"id":2,"name":"Cat","status":"pending"}]

Here’s the full YAML for the coal virtual service created so far.

apiVersion: gateway.solo.io/v1
kind: VirtualService
metadata:
  name: coalmine
  namespace: gloo-system
spec:
  displayName: coalmine
  virtualHost:
    domains:
    - '*'
    name: gloo-system.coalmine
    routes:
    - matcher:
        prefix: /petstore
      routeAction:
        single:
          upstream:
            name: default-petstore-v1-8080
            namespace: gloo-system
      routePlugins:
        prefixRewrite:
          prefixRewrite: /api/pets

Function Routing

Would it be better if we could just route to the named REST function versus having to know the specifics of the query path (i.e. /api/pets) the service is expecting? Gloo can help us with that. Let’s setup a route to findPets REST function.

glooctl add route \
   --name coalmine \
   --path-prefix /findPets \
   --dest-name default-petstore-v1-8080 \
   --rest-function-name findPets

And test it. We should see the same results as the request to /petstore as both those examples were exercising the findPets REST function in the petstore service. This also shows that Gloo allows you to create multiple routing rules for the same REST functions, if you want.

curl ${PROXY_URL}/findPets

If we want to route to a function with parameters, we can do that too by telling Gloo how to find the id parameter. In this case, it happens to be a path parameter, but it could come from other parts of the request.

Note: We’re about to create a route with a different name findPetWithId than the function name findPetById it is routing to. Gloo allows you to setup routing rules for any prefix path to any function name.

glooctl add route \
   --name coalmine \
   --path-prefix /findPetWithId \
   --dest-name default-petstore-v1-8080 \
   --rest-function-name findPetById \
   --rest-parameters ':path=/findPetWithId/{id}'

Let’s look up the details for the pet with id 1

curl ${PROXY_URL}/findPetWithId/1
{"id":1,"name":"Dog","status":"available"}

And the pet with id 2

curl ${PROXY_URL}/findPetWithId/2
{"id":2,"name":"Cat","status":"pending"}

Here’s the complete YAML you could apply to get the same virtual service setup that we just did. To recreate this virtual service you could just kubectl apply the following YAML.

coalmine-virtual-service-part-1.yaml view raw
apiVersion: gateway.solo.io/v1
kind: VirtualService
metadata:
  name: coalmine
  namespace: gloo-system
spec:
  displayName: coalmine
  virtualHost:
    domains:
    - '*'
    name: gloo-system.coalmine
    routes:
    - matcher:
        prefix: /findPetWithId
      routeAction:
        single:
          destinationSpec:
            rest:
              functionName: findPetById
              parameters:
                headers:
                  :path: /findPetWithId/{id}
          upstream:
            name: default-petstore-v1-8080
            namespace: gloo-system
    - matcher:
        prefix: /findPets
      routeAction:
        single:
          destinationSpec:
            rest:
              functionName: findPets
              parameters: {}
          upstream:
            name: default-petstore-v1-8080
            namespace: gloo-system
    - matcher:
        prefix: /petstore
      routeAction:
        single:
          upstream:
            name: default-petstore-v1-8080
            namespace: gloo-system
      routePlugins:
        prefixRewrite:
          prefixRewrite: /api/pets

Summary

This post is just the beginning of our function gateway journey with Gloo. Hopefully its given you a taste of some more sophisticated function level routing options that are available to you. I’ll try to follow up with more posts on even more options available to you.

New Personal Blog Site

Photo by Sushobhan Badhai.

I finally got around to updating my blog site to use Jekyll hosted on GitHub.com. I’m still looking at other static web site generators like Gatsbyjs and Hugo.

A lot has happened since the last time I posted. Currntly I’m working at Solo.io leading their emerging Customer Success team. Its a small, and very promising startup in the microservices gateway, and service mesh space. I’m very excited to be there, especially as I’m getting back hands on with code and technology again. Yay!

My hope is to get back into blogging and writing, so hopefully you see new posts and such appearing here soon.

socat is so cool...

I was helping someone the other day figure out how to use Camel to create a TCP/IP proxy, and I was trying to figure out the best way to test. Hiram Chirino pointed me at the socat utility, which is so super geeky cool that I am inspired to post about it...

I installed socat on my Mac using MacPorts

> sudo ports install socat

The full code is here on GitHub https://github.com/scranton/camel-example-tcpipproxy.

The Camel route is straightforward. It uses Camel-Mina to both listen on port 5000 and to connect to a request-response (InOut) service on port 5001.


When you run this route, you can use socat as both the back-end service (echo style) and as a client. To start it as a back-end echo service, which will start a TCP/IP listener on port 5001 and will echo all messages sent to it (that's what 'PIPE' does).

> socat PIPE TCP4-LISTEN:5001


To use socat as a TCP/IP client, run

> socat - tcp:localhost:5001

Now any text you type in the Terminal where you started the client will be echo'd back to you - after it goes to and from the socat echo service. You can test this by stopping the socat echo service and seeing how the client reacts.

Back to the Camel proxy... To test, after you start the socat echo server, you'd start the Camel route

> mvn install camel:run

This will start the Camel route standalone (the full example can also be deployed within ServiceMix), with a TCP/IP listener on port 5000 and a connection to the echo service on port 5001. Now you can start the socat client, but this time against port 5000 (the Camel proxy)

> socat - tcp:localhost:5000

Now your text messages will run through the Camel proxy before going to the back end echo service; the Camel route will log each message that it proxies.

A quick example of a cool TCP/IP utility, and how to use the powerful Camel framework to proxy anything... Thanks for the tip Hiram!

I got an article published at JDJ...

OSGi: An Overview of Its Impact on the Software Lifecycle
— OSGi technology brings a number of much needed benefits to the Java enterprise application market, and is disruptive in that it impacts the software development, deployment, and management practices of many organizations. OSGi impacts deployment given the shared, modular nature of OSGi, meaning application code must be written differently to capitalize on the benefits of OSGi. Equally important, application management processes need to be adjusted, given the highly shared nature of OSGi modules across many applications. This article provides a high-level overview of OSGi, and the impact this framework is having on the software lifecycle.